From Code To Pixels. How Web Rendering Works
This article looks at how web browsers render content, with a focus on retained vs. immediate modes. It walks through the path from code to what appears on screen and shows how knowing it can lead to better web design and optimization.
2024 marks 8 years since I began working in IT. I started out in 2016 as a junior UI designer and, some time later, moved into a front end developer role. Making things move on the screen, particularly in the browser, has always fascinated me. Still, it was only quite recently that I put my knowledge of how things actually get rendered there into some order.
Naturally, I was familiar with the basics. But there were 2 things I understood intuitively without being truly aware of them: the formal classification of ways to build graphical user interfaces, and which of those models browsers follow.
Design Patterns
So, what options do we have for building user interfaces? To quote a legend, there are essentially 2 schools of thought. We can go with either the retained or the immediate mode.
Retained Mode
In retained mode, the system is responsible for managing and storing every object you render. It also offers plenty of handy abstractions that make building the UI quicker, such as inputs, buttons, and so on. In the browser, HTML gives elements their structure, CSS defines how they look, and JavaScript specifies how they behave (although that last part is optional). The system then looks after their state.
It’s all quite simple. To draw an animated rectangle offset 5 pixels from the top-left corner, you need one line of HTML and a handful of lines of CSS, as in the “Browser - retained mode” demo built on CodePen.
Whenever the state (in this case, the background color) changes, there’s no need to redraw every object. Their state is retained. You can change how they behave, but the browser still handles keeping track of position, background color, event handling and so on.
Immediate Mode
Immediate mode works somewhat differently. Here, the developer is responsible for constructing a graphical object, setting its properties, and explicitly updating them whenever necessary. This typically takes place inside a render loop. Some features may have to be built from the ground up. As a developer, you are the one looking after every pixel. No opinionated system stands behind you. It’s all on you.
Made with ImgFlip
This approach may be familiar from the browser as well, as in the “Browser - immediate mode” demo built on CodePen.
We set out to build the same animated rectangle (almost) without HTML and CSS, and the job got harder. Nothing takes care of the basics, such as converting colors or computing the intermediate colors between the 2 we specified in CSS in the earlier example. Correctly aligning text relative to a rectangle is also difficult to reproduce, since there’s no built-in way to do it for us. The draw function executes on every frame, and the state isn’t retained. It’s up to us to maintain it each and every time.
This is how graphics APIs work. In the browser, the canvas element can be thought of as an “enclave” of immediate1 mode.
And if you want even finer-grained control, you can move from the 2D context to WebGL, WebGL2, or WebGPU contexts (where supported).
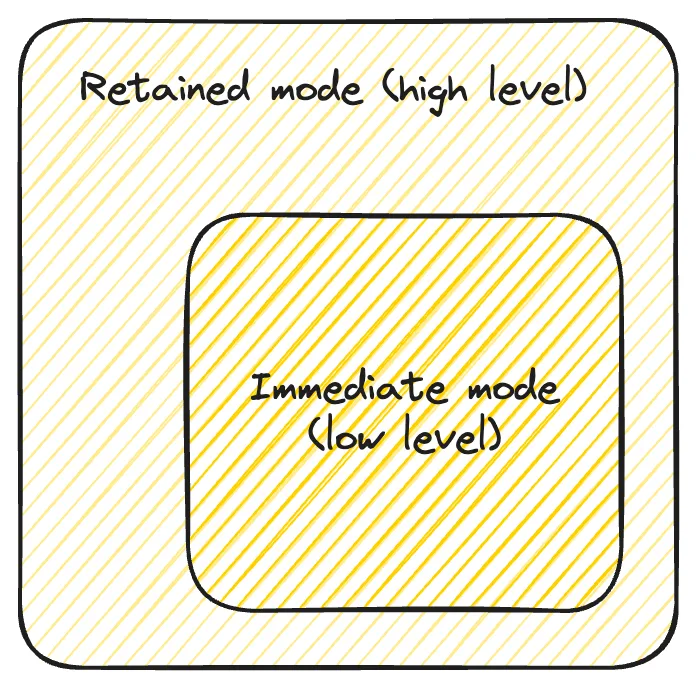
The retained-immediate hierarchy
When to Use Which
In retained mode, the system acts as a sort of wrapper that makes the work quicker and more flexible. Choose it when you lack the time to implement essentials such as layout management, accessibility features or SEO. It’s the ideal option for static content – forms, paragraphs, inputs or images.
Immediate mode excels where control and performance are key: in constantly changing environments such as games or data visualizations.
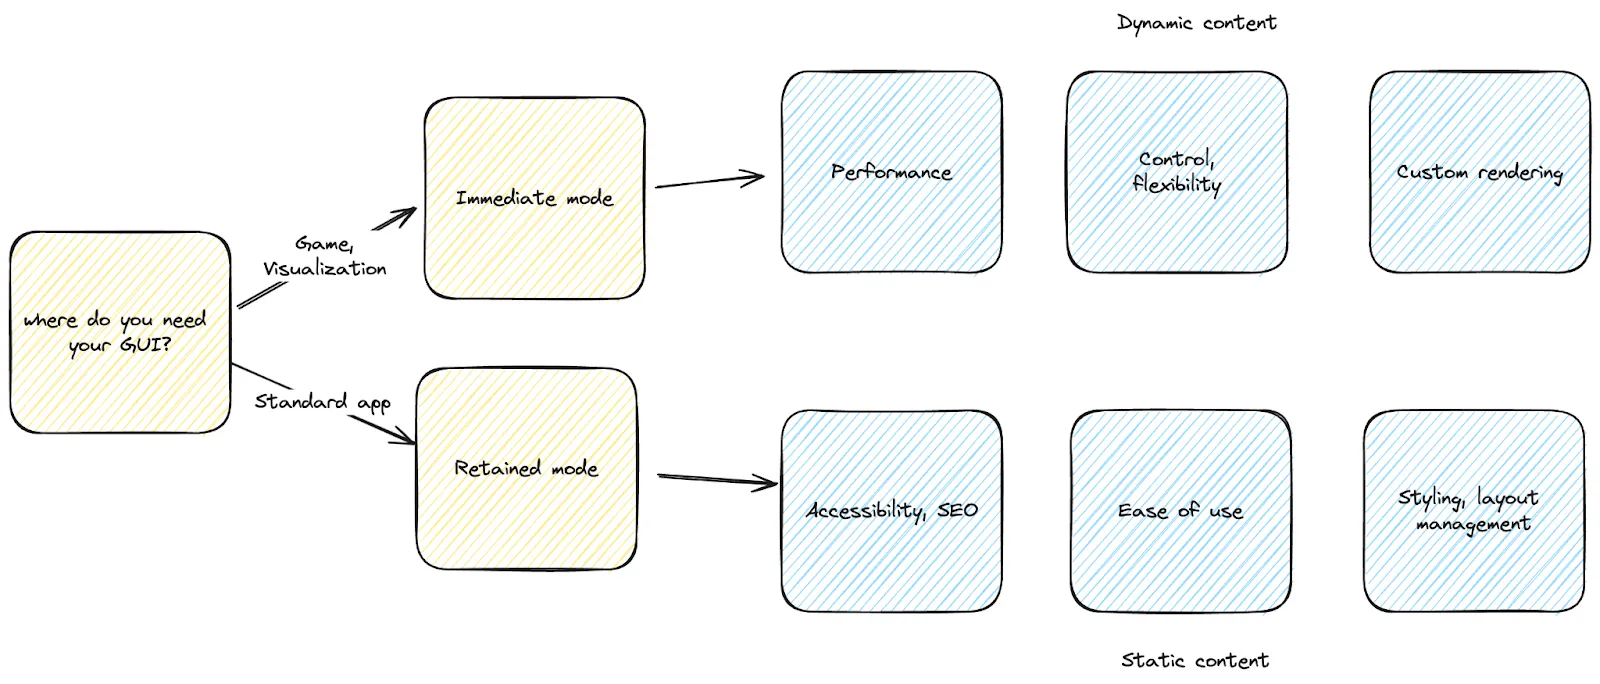
Use cases for GUI modes
HTML, CSS, and Pixels
So the browser operates in retained mode. But how does that work in detail? Let’s dig deeper. Since the majority of the Internet favours Chrome, I’ll use its rendering engine, Blink, as the example.
What follows is simplified, but it should be good enough as a general overview. I’ll frequently refer to a superb source of knowledge: Steve Kobes’s The Life Of A Pixel presentation. And if you’d like to learn more about Blink as a whole, I suggest reading this document.
Parsing and DOM Construction
Blink starts by parsing HTML and CSS to build the DOM tree – Chrome’s internal model of a page. Thanks to the V8 engine, it can be changed via JavaScript. In parallel, CSS gets parsed and style values are computed for each element. You can look at them in the “Computed” tab of the developer tools.
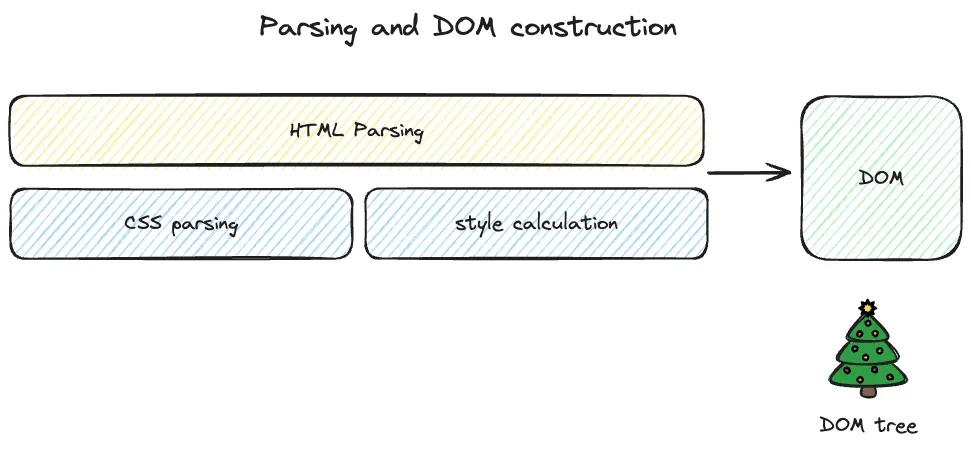
Diagram of parsing and DOM construction
Rendering Pipeline
Next comes rendering.
- Layout (Reflow)
Its first stage is the layout process (also called reflow). Its tasks include:
- Computing geometry. It works out the coordinates and dimensions of every DOM element in the document.
- Ordering elements. It arranges blocks of content in a particular order. Various layout types use various orders, but the simplest, the flow layout, lays them out in the block or inline direction.
- Measuring text. More precisely, measuring runs of text. A “run of text” is a sequence of characters that share one style and sit inside the same layout block, for example a paragraph with a particular
font-family,font-size, etc. Measuring text essentially means determining the width and height of text content. - Calculating bounding rects. Lastly, layout computes the various bounding rects an element can have, such as a border box or the overflow rect.
However, it works on a separate tree, known as the layout tree. In it, one DOM node typically maps to one layout object. That’s not always true, though. Nodes with display: none and span elements get no display object (unless the span carries styles that influence the layout).
- Paint
During paint, every layout object receives a display item holding a list of paint operations. Paint operations are instructions telling the browser precisely how elements should be drawn.
Paint follows stacking order rather than DOM tree order. That way, overlapping elements are stacked properly. You can alter the stacking order by adjusting an element’sz-indexin CSS.
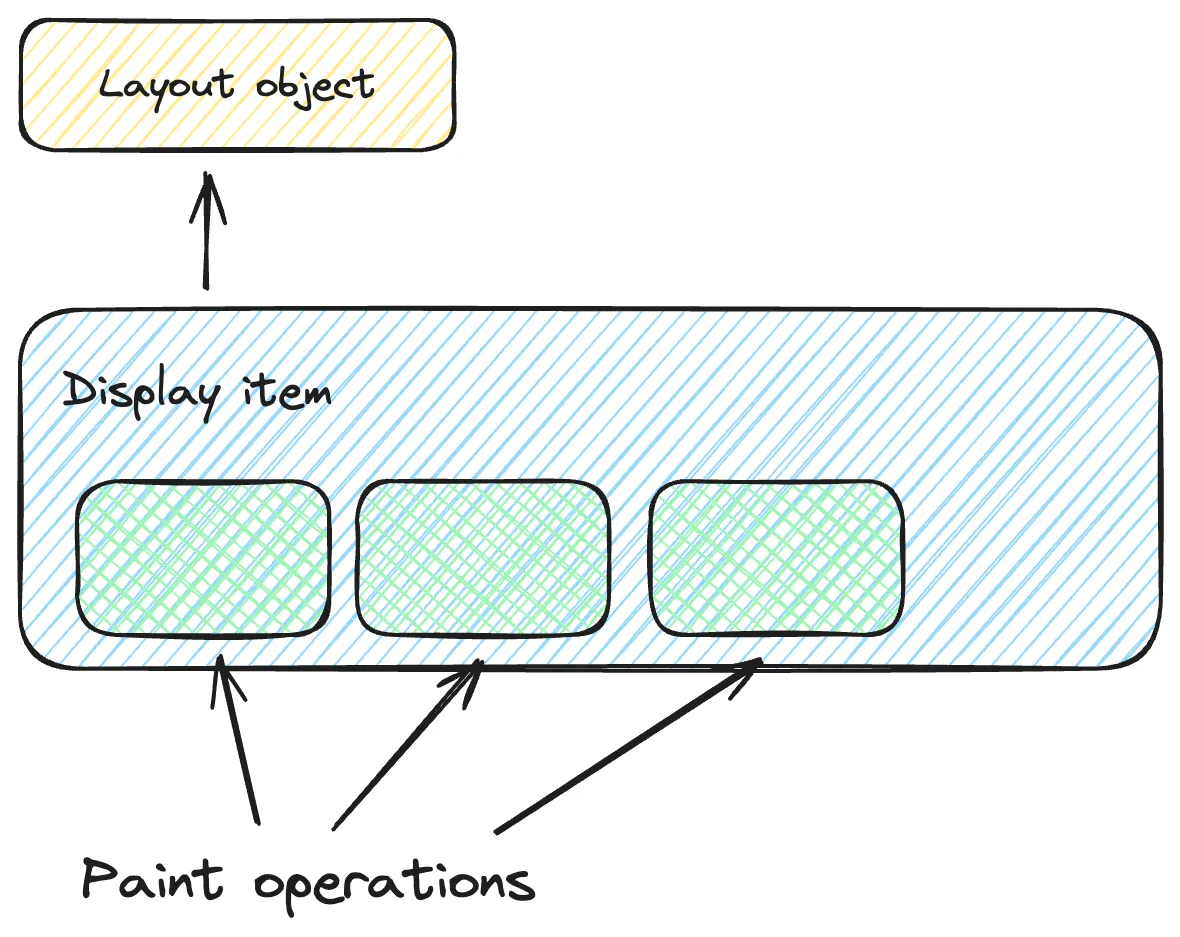
Diagram of the paint process (simplified)
- Raster
Lastly**,** display items are turned into bitmaps of color values kept in GPU memory. The raster process also decodes any image assets referenced in your HTML and CSS.
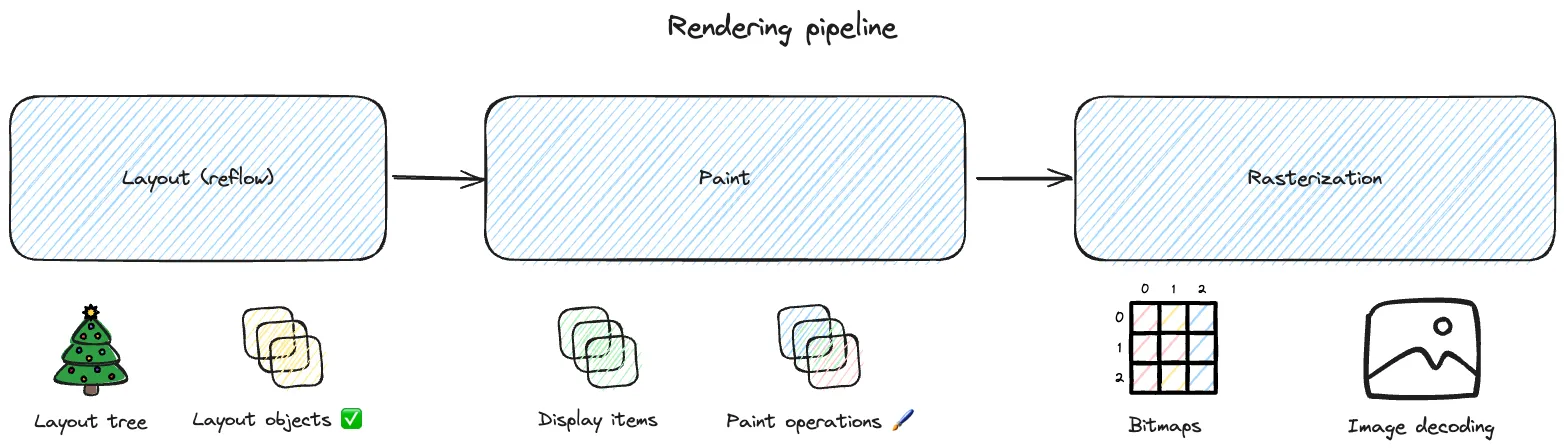
Diagram of the rendering pipeline
Optimizations
Yet the web page stays interactive, so the pipeline has to adapt dynamically to changes and user input. The browser deals with this in 2 ways.
Animation Frame
First, the renderer generates animation frames, each being a full visual snapshot of the state at a given moment. Put differently, the output of one run of the pipeline. If you think back to the canvas example a few paragraphs earlier, you’ll spot a trace of this in window.requestAnimationFrame. That’s our render loop. Although the browser mainly works in retained mode, it smoothly blends in these immediate-mode-style operations, offering both efficiency and control.
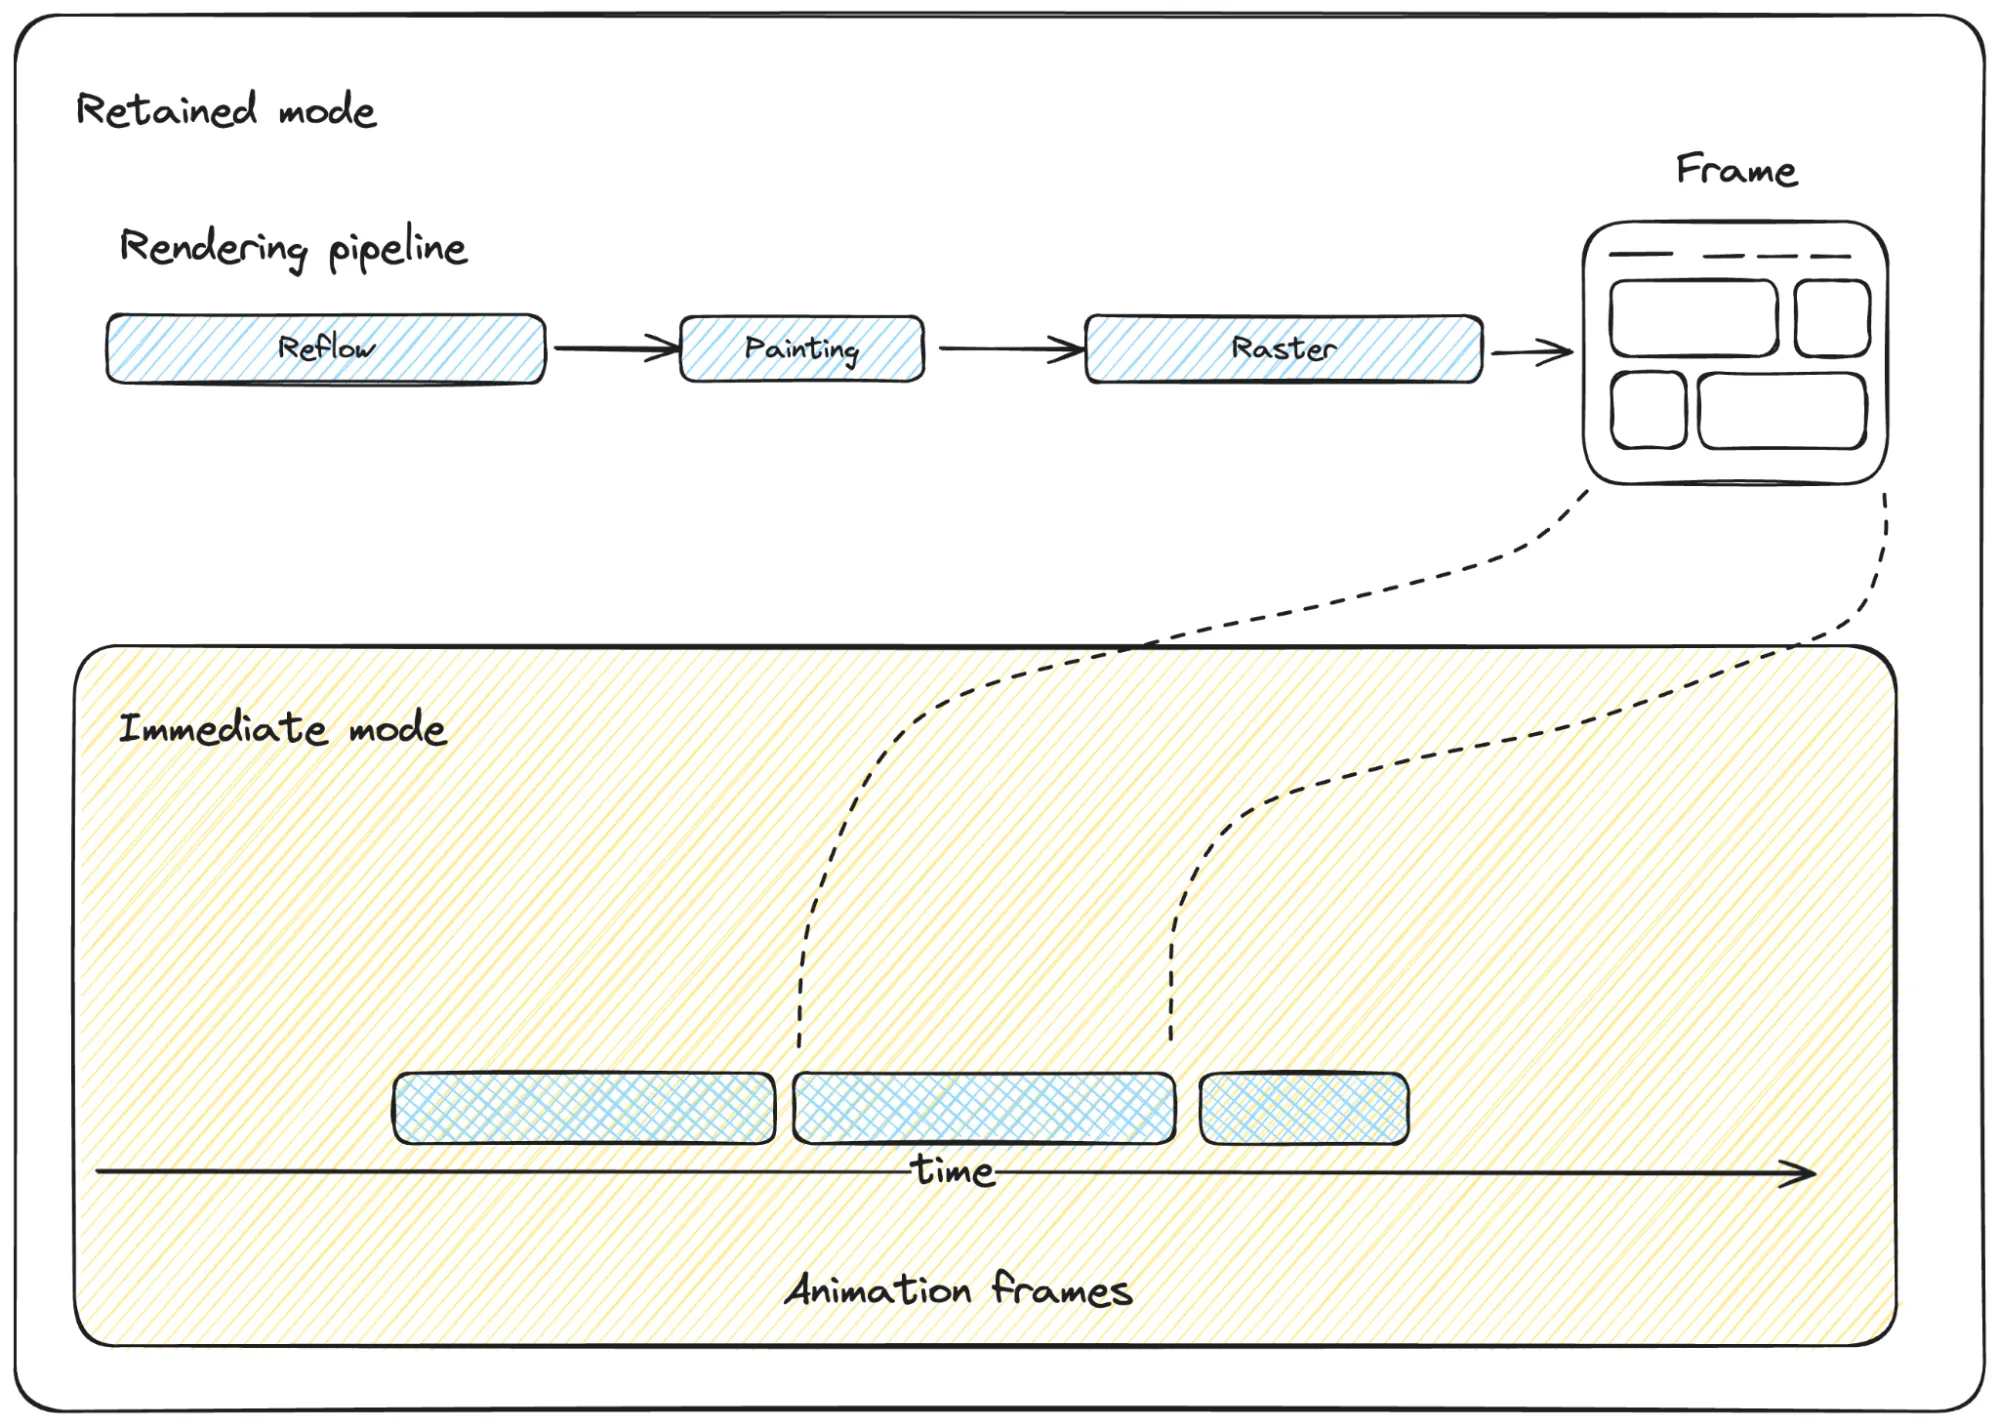
Retained and immediate mode inside the browser
Reflow & Repaint
Second, whenever something changes, the browser determines which stages of the pipeline must be updated – or, put another way, invalidated. While doing that, it tries to reuse as much of the earlier rendering output as it can.
That isn’t always possible, though. Certain invalidations can be costly, particularly when they affect big portions of the DOM. This is why unneeded reflows and repaints are regarded as harmful. It’s good practice to rely on GPU-accelerated CSS properties such as transform or opacity.
Compositing And Tiling
Still, when a reflow or repaint does happen, the browser attempts to limit the performance cost. A central mechanism for this is compositing, which divides the webpage into several layers. Each layer is rasterized on its own, frequently with GPU acceleration. The last stage of compositing, in which the layers are merged into one coherent image, is handled efficiently on a separate thread to keep rendering and interaction smooth.
Scrolling is a good example: the content layer moves in response to the user while another layer clips it.
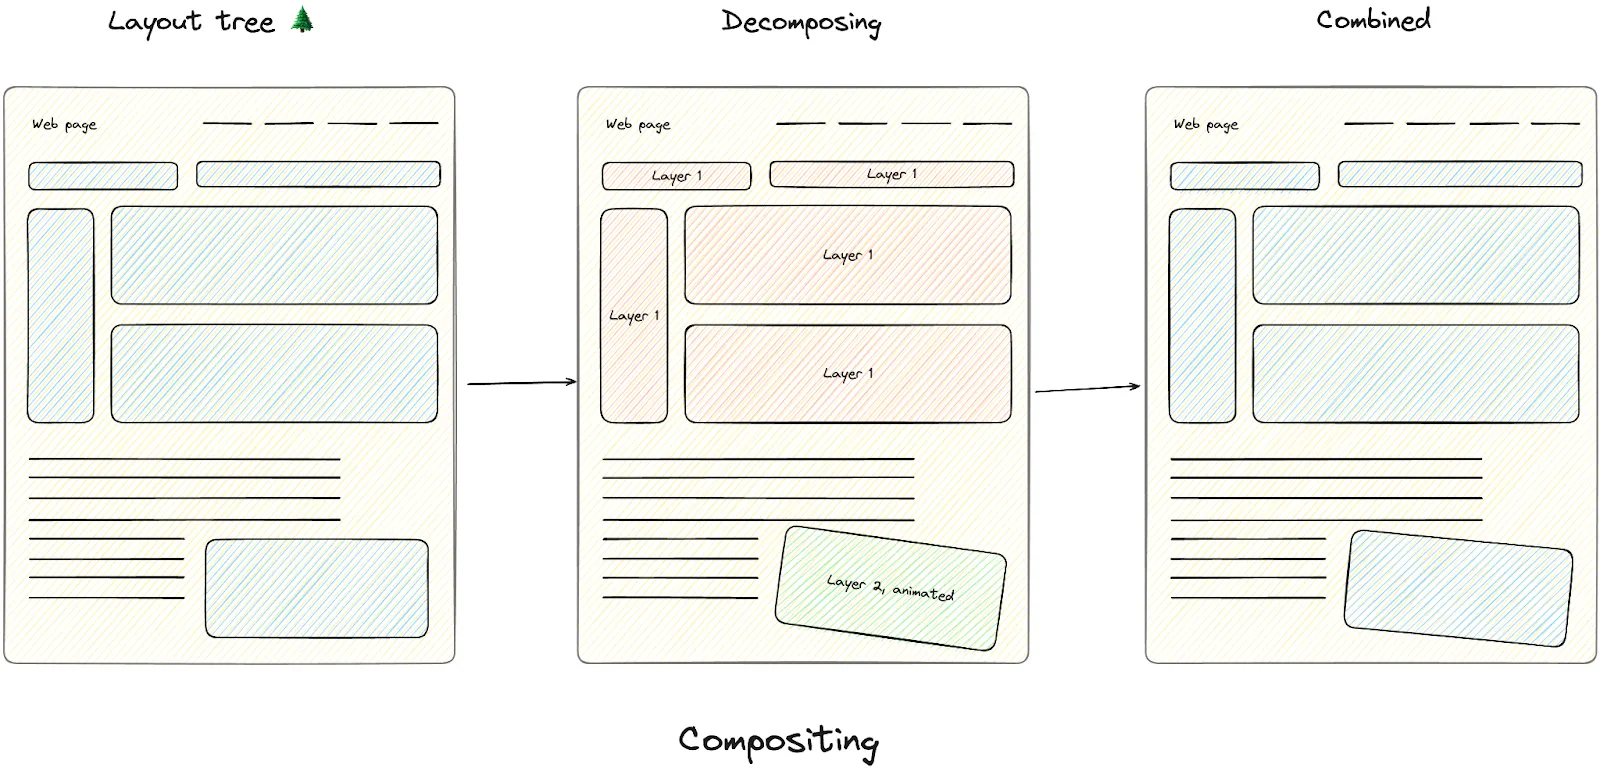
Diagram of compositing
On top of that, since rasterizing big layers in one go can be costly, Blink divides them into tiles. As a result, only the visible portions of the content get rasterized, which improves performance.
Browsers implement many more mechanisms to deliver content quickly. If you’re curious to learn more, take a look at the documents linked earlier.
Summary
Day to day, we don’t really think about how browsers work. When we click something on a web page or drag a slider, things seem to happen instantly. Front end developers learn the fundamentals they need for everyday work, such as using browser APIs or working with the DOM. But even they rarely dig deeper than necessary.
Exploring what goes on under the hood can be not only enlightening but also practical when picking the right design patterns and architectures, and when optimizing new or existing projects. And if you’re geeky enough, it can be great fun, too!
Every diagram was made with Excalidraw